


4 Methods to Manage Your Network Switches (Internet switch setup)

Unmanaged switches and managed internet switches are two categories of network switches. The former is a plug-and-play fool-type switch, which does not directly process data and requires no configuration. However, the managed switches have abundant features that rely on the IT professional’s configuration. The first step is to log into the managed switch. The article will introduce the four most common methods to log into a network switch: Console port, WEB, SSH, and Telnet.
Network Switch Login Method Introduction
The Console Port (CON) is on the switch front panel. It complies with the RS-232 standard for serial communication of data. Logging into a network switch via the console port is the most basic login mode. When logging into a switch for the first time or implementing other login methods, logging via the console port is the premise.

Web-based Interface is a web-based management interface that allows users to interact with software running on a server using a web browser. It provides an easy solution to configure and manage the switch through a graphical user interface (GUI). HTTP and HTTPS are two protocols to transfer data between Web browsers and the website. HTTPS using encrypted data is a secure communication method over HTTP.
Telnet and SSH are two approaches that provide remote access to virtual terminals. Telnet (Teletype Network) is a standardized TCP/IP protocol for virtual terminal service, which uses port 23 in default. It has security risks in remote access since it uses plain text to transfer data. Therefore Telnet is recommended to use in local area network that has lower risk of security attacks.
SSH (Secure Shell) is a cryptographic network protocol for data communication over a network with a high cyber attack potential. SSH encrypts the data transferred between the server and client, a more advanced replacement for the previous remote access protocol vulnerable to security attacks such as Telnet. SSH is a better choice for reliable remote access in potentially insecure networks, such as the public network.
The exact login method may vary from switch vendor to model. QSFPTEK S5300 and S7300 series switches support the above four login methods. We will take the S5300 switch as an example to give you a step-by-step guide.
Log into a Switch via Console Port
1. Prepare a console cable to connect the switch to the computer. Insert the RJ45 connector of the console cable into the console port on the switch. Connect the D89 female connector on the other end of the console cable to the serial port on the computer host. (Note: If you use a laptop or PC without a serial port, you will need an RS232 D89 to USB converter cable)
2. Turn on the computer and install terminal emulation software, such as SecureCRT, PuTTY, MobaXterm, etc.
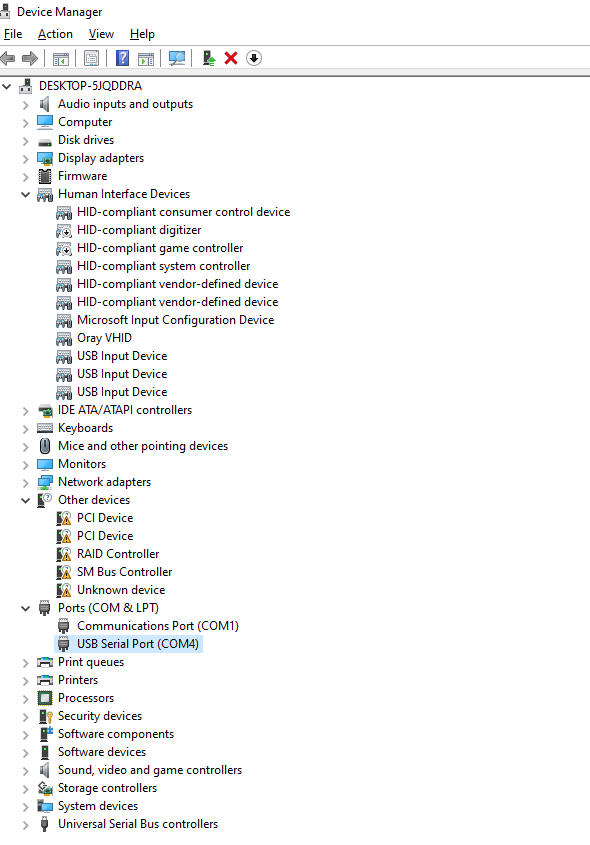
3. Press the Window+R button and enter “devmgmt.msc” to open the device manager. In the pop-up interface, click port (COM and LPT) to see the PC console port, and we get “com4” for the USB connection to the laptop.
4. Power the network switch and open the terminal emulation software installed in step 2. Choose the serial login mode and configure the parameters of the terminal emulation software as follows: Serial Port - COM4, Speed - 9600.
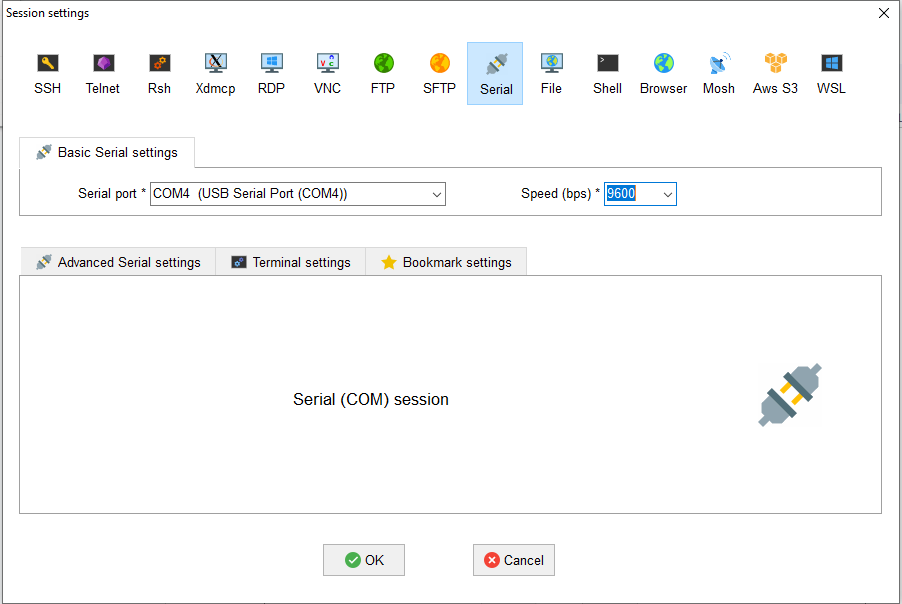
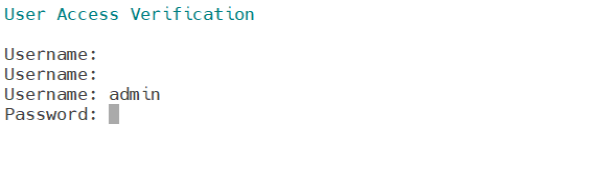
5. Pree OK button, then in the pop-up interface enter the default username and password (admin/admin) to login into the switch.
Log into a Switch via the Web-based Interface (HTTP/HTTPS)
1. Check the IP address of the default management VLAN.
Switch#show ip interface vlan 1
VLAN1 is up, line protocol is up
Vrf id bound 0, hardware vrf supported
Internet address is 192.168.0.1/16
Broadcast address is 192.168.255.255
MTU is 1500 bytes
Helper address is not set
Directed broadcast forwarding is disabled
Multicast reserved groups joined: 224.0.0.9 224.0.0.6 224.0.0.5
224.0.0.2 224.0.0.1
Outgoing access list is not set
Inbound access list is not set
IP forwarding is always sent
ICMP redirects are always sent
ICMP unreachables are always sent
ICMP mask replies are never sent
2. Enabled HTTP service function.
Switch_config#ip http server
3. Ensure the computer is in the same network segment as the network switch: Set the PC's IP address to 192.168.0.x (where "x" is any number from 2 to 254) and the subnet mask to 255.255.255.0. , and press the OK button.

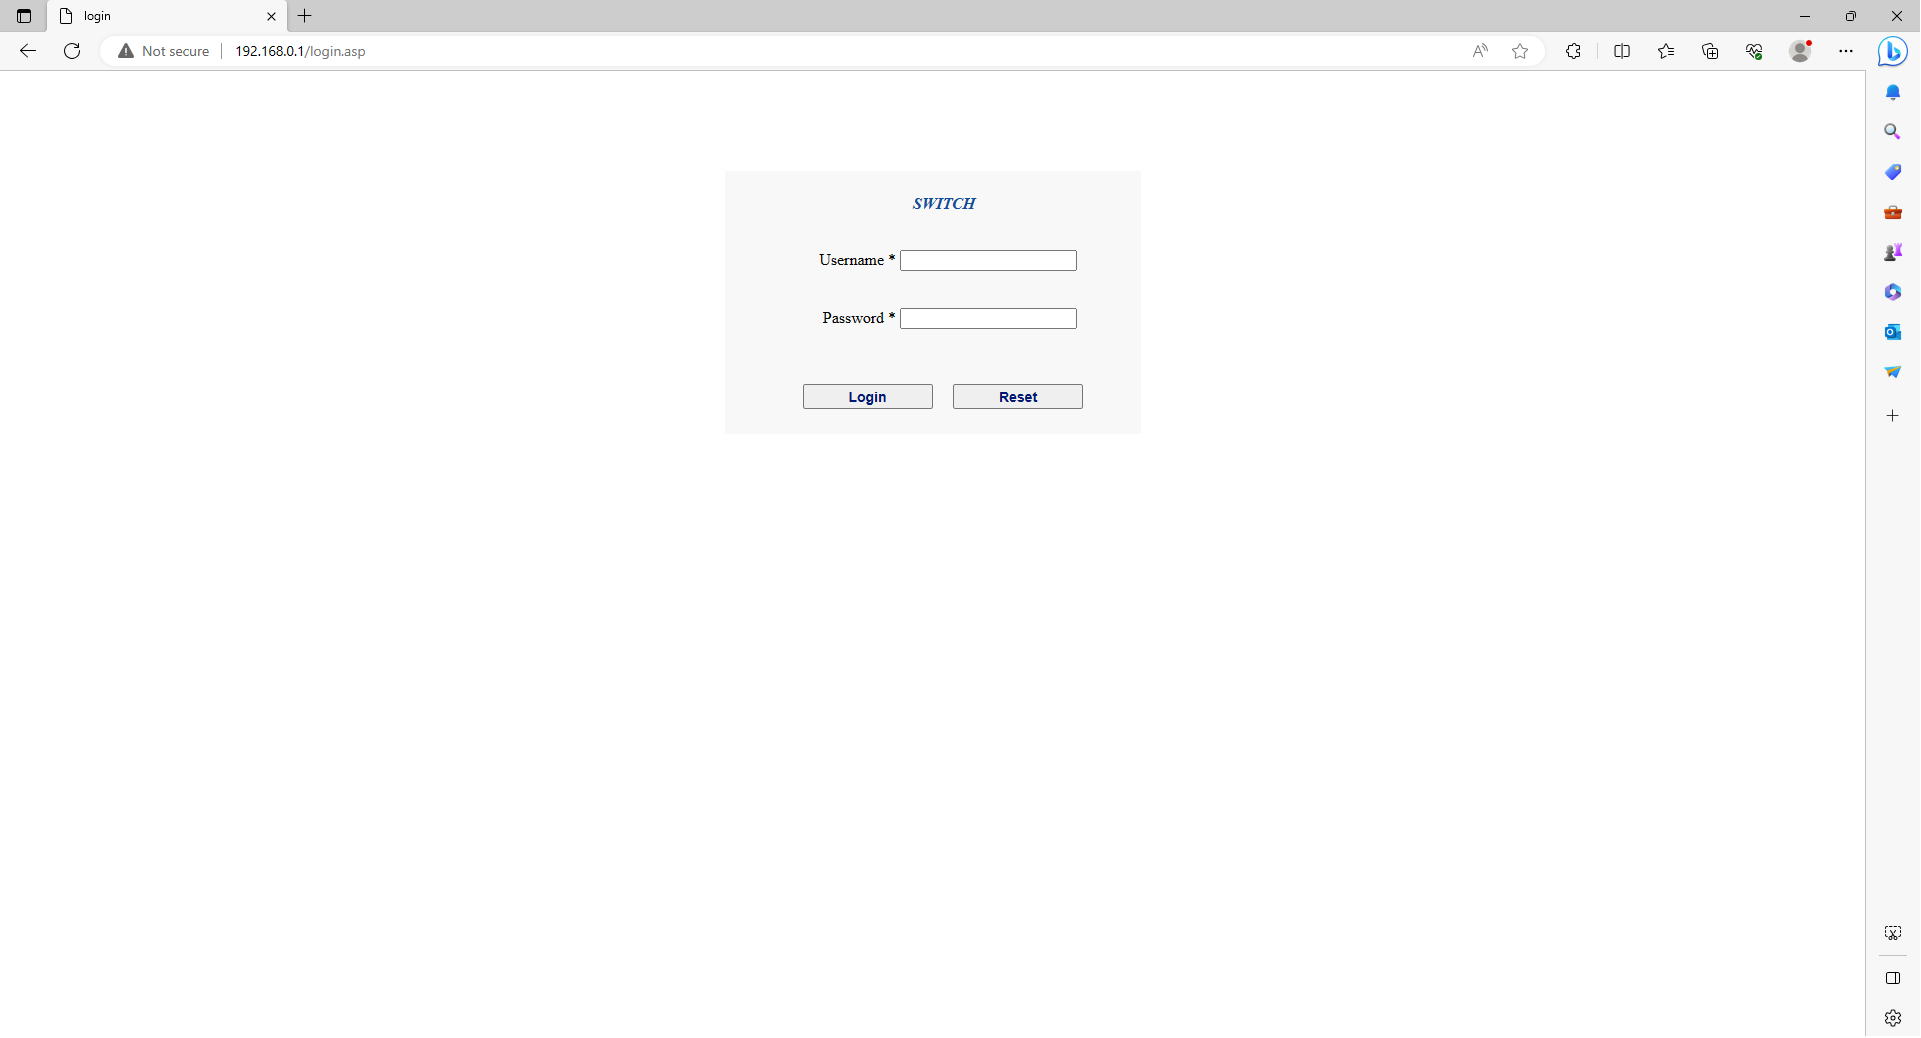
4. Open a browser, and type http://192.168.0.1 in the address bar. Enter the default username and password (admin/admin) and click sign-in to access the web-based configuration page.
Log into a Switch via Telnet
1. Check the IP address of the default management VLAN.
Switch#show ip interface vlan 1
VLAN1 is up, line protocol is up
Vrf id bound 0, hardware vrf supported
Internet address is 192.168.0.1/16
Broadcast address is 192.168.255.255
MTU is 1500 bytes
Helper address is not set
Directed broadcast forwarding is disabled
Multicast reserved groups joined: 224.0.0.9 224.0.0.6 224.0.0.5
224.0.0.2 224.0.0.1
Outgoing access list is not set
Inbound access list is not set
IP forwarding is always sent
ICMP redirects are always sent
ICMP unreachables are always sent
ICMP mask replies are never sent
2. Enabled Telnet service function.
Switch_config#ip telnet enable
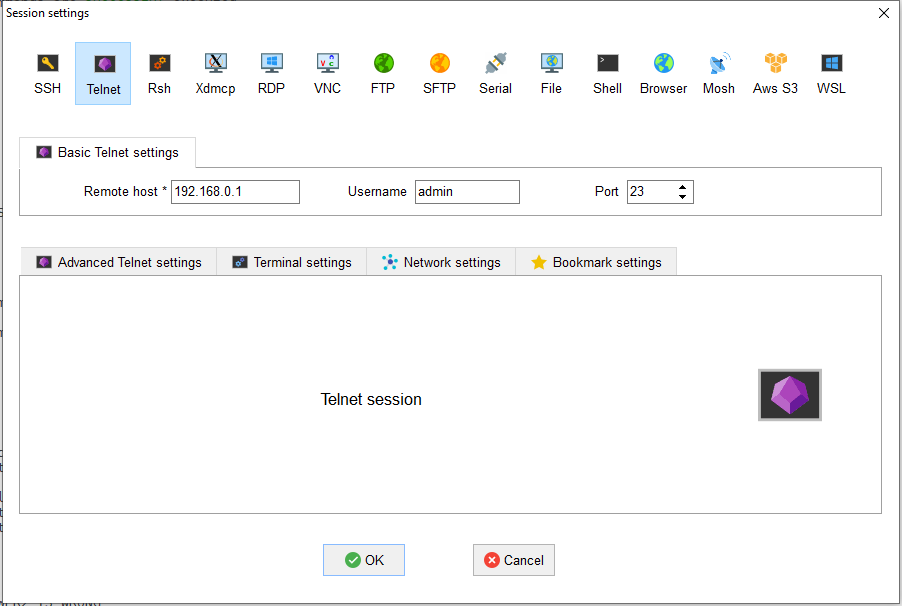
3. Open the MobaXterm software, and choose the login mode as Telnet. Fill in 192.168.0.1 in the remote host and 23 in the Port field. The account code is admin/admin.
Log into a Switch via SSH (Secure Shell)
1. Check the IP address of the default management VLAN.
Switch#show ip interface vlan 1
VLAN1 is up, line protocol is up
Vrf id bound 0, hardware vrf supported
Internet address is 192.168.0.1/16
Broadcast address is 192.168.255.255
MTU is 1500 bytes
Helper address is not set
Directed broadcast forwarding is disabled
Multicast reserved groups joined: 224.0.0.9 224.0.0.6 224.0.0.5
224.0.0.2 224.0.0.1
Outgoing access list is not set
Inbound access list is not set
IP forwarding is always sent
ICMP redirects are always sent
ICMP unreachables are always sent
ICMP mask replies are never sent
2. Enabled SSH service function.
Switch_config#ip sshd enable
Switch_config#ip sshd version 2
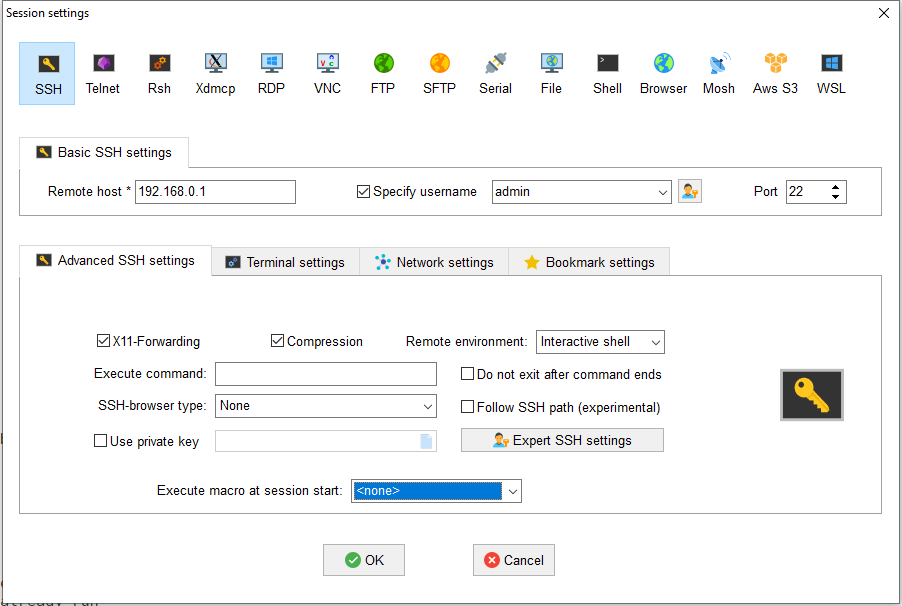
3. Open the MobaXterm software, and choose the login mode as SSH. Fill in 192.168.0.1 in the remote host and 22 in the Port field. The account code is admin/admin.
Last Word
This article provides you with 4 approaches to logging into an managed ethernet network switch. Customers deploying QSFPTEK switches can follow the above steps to complete the login and configuration. However, the specific method or options can vary from switch vendors and models. Make sure to consult the vendor or check the technical document for reference. If you are hesitate to choose unmanaged switch or managed switch, you can refer to this video: Managed Switch vs Unmanaged Switch: How to Choose? - Youtube
If you need help on how to log into a network switch, please contact [email protected].


share
